Monday, February 28, 2011

More Sympathy


Sympathy cards are not hard to make in general, just simple words and beautiful flowers. They are harder to make when they are needed. They are especially hard to make for friends and family whose pain you want to ease, whose sorrow you want to eliminate.

This card is for a friend who lost her father. When I'm making something for someone specific I think about them, and pray for them, through the entire process. I know that my friend is really hurting and I don't know if my efforts at a card are going to help them in anyway. But I know that my prayers are heard and I hope that God will replace her sorrow with loving memories.
 
The particulars
Paper: Sahara Sand, Papertrey Ink White
Stamps:Long retired SU Both Way Blooms Ink: Momento Black, Copics
Embellishments: Ribbon (can you believe it?), Silhouette scalloped circle shape, Making Memories Alpha stickers colored with Copics. Tools: Fiskars Border punch, Dimensionals


Happy Crafting,

Thursday, February 24, 2011

With Sympathy

This card was made for a woman at our church, who I don't even know yet. She lost her mother this week. She also lost her baby girl within the year. I was asked in my Bible study and by our Family Group to pray for her and I wanted to let her know personally that I have her and her family in my thoughts and prayers. I lost several loved ones a few years ago, dear friends and my aunt and uncle and at times I still feel myself reeling. I can't imagine losing a parent and a child in the same year.

I'm sending this off today but if you are hurting because of the loss of a loved one consider this post a message to you too. I pray that all those mourning a loved one today find a bit of God's peace.

Card Details
I used some random green patterned paper (once it's been in the folder for a while the manufacturer's names are lost on me, also it was most likely bought on the clearance rack and is no longer available) for the background. I stamped the beautiful flourish from Papertrey Ink's Fancy Flourishes using SU's Wild Wasabi Green and the sentiment from SU's long retired Warmest Regards in Handsome Hunter. I colored the rose from Stampin' Up!'s (SU) Fifth Avenue Floral set with Copics (R00, R20, W1), cut it out and used pop dots to give it some depth. The internal sentiment, from SU's God's Blessings set, was stamped in Hunter as well and reads:
May God's love
heal your sorrow, and may
His peace replace your
heartache with
warm and loving memories.

Happy Crafting,

Wednesday, February 23, 2011

WOYWW - Quick and dirty

This is a quick post of a dirty desk.
Mess of a desk. Click for a larger image.
Last night I decided to practice a bit more with my Copics and the resulting mess is what I have to share with you today. I was somewhat happy with the chatting girls (Stampin' Up!s retired Time with You set) but the card looked blank so I decided to add the cycling girl from the same set and it was all down hill from there. The basket of blooms covered the feet of girl on the left and my attempt to make a scene was sad at best (notes to self - Don't rush. Plan a bit).

Scene created with SU Time with You stamp set and Copic Markers.
Click for a larger image.
 And now an apology to all the WOYWW ladies. I didn't get to looking at many of your desks last week and it will only get worse. As classes get a bit more intense my participation as a viewer will dwindle more and more. For those unfamiliar with WOYWW stands for What's On Your Workdesk Wednesday and is a weekly post linked to Julia Dunnit's blog Stamping Ground. There are over 100 desks shared each week that may offer inspiration for projects or organization.

Lastly welcome to my new followers. I know you're interested in Silhouette tutorials and I am working on one that hopefully will be posted within the week.

Happy Crafting,

Tuesday, February 22, 2011

An insommniac with Copics

Last night long after I should have been in bed I was playing with my Copics and the Year of Flowers Lily of the Valley Set from Papertey Ink. I picked up a medium green and blue marker yesterday and wanted to see what I could make with them. A mess is what I made. A mess. 
I liked this card best of the messes I made, though there are lots of places I would have/could have done better if I wasn't tired and a bit bleary eyed. Tonight I am going to bed early so I will get plenty of rest for tomorrows class.
 
 
I went to a day long crop Saturday and finished 9 pages and laid out 2 more, admittedly they aren't terribly creative but they are done and I can move on. I also didn't spend every minute of the 14 hours I was there scrapping. I chatted with a former co-worker, I chatted with my scrapping buddies, I shopped, I ate. I had a great girls day. In the coming days I'll post a picture or two from this session and a few tips for making scrapping a bit easier. All I will say for now is go get yourself some repositionable tape.
 
Also a couple of new Silhouette tutorials are in the works.

Happy Crafting,

Wednesday, February 16, 2011

WOYWW short and sweet

Crafty ladies around the world are taking pictures of their work desks on Wednesdays and posting links to Julia Dunnit's Stamping Ground. This is a challenge if you have limited space. I can cut off a lot of the image and focus on one bit of the desk, or I can back up and do a back bend over my computer desk to get a wider shot, or I can point the camera straight down while lifting it high above my desk and praying I'm getting something decent. The latter is what I chose for today.
Click on image for a closer look.
Do any other WOYWWers have to do anything unusual to get the shot? Do you stand on a chair, hold your camera in the air, go for the long shot from the hall or another room?  
I'd love to hear your tricks.

Sorry no more time for blogging today because:
  • My father is coming to visit for a few days so I need to clean the house and buy groceries.
  • I need to prepare for tonight's class.
  • I need to produce a newsletter (without much material yet) by tomorrow.
  • I need to help my son complete his pinewood derby car cat. He wants it to look like a cheetah.
  • I need to pack for Saturday's crop (this time I WILL BE PREPARED). Best news regarding the crop - I found the pictures I've been looking for for months (hidden on a poorly marked disk). Must find a better system for keeping pictures.

Happy Crafting,

Tuesday, February 15, 2011

Two in one day

I thought I'd give Nichole's Challenge another go. I used the Lily of the Valley set from the Year of Flowers series (the only one I own) and stamped it in white on Hawaiian Shores card stock (this is only of 2 colors of PTI card stock I own. I wanted to keep it all PTI if I could.) I outlined in Copics, so that it would stand out and I thought it was a colossal failure. I couldn't see it well I tried to save it by stamping over it in Stampin' Up!'s Taken with Teal ink. It was better but not great.
I scored the vellum just like Nichole but I didn't have a 1/8" strip of adhesive so it looks, well not great. I found a big black button in the stash and used it, stitching it on with white embroidery floss. Would never use white in real life but on a card it's ok. I looked at it and looked at it and decided I could do better if I didn't try to copy someone else and just did my own thing.


Enter balloons and clouds. I inked up my Up, Up and Away set, got out the Cuttlebug and made a few die cuts then colored the balloons in with my limited Copics collection. I like this one MUCH BETTER. I hid glue dots under the cloud and balloon that cover the vellum strip and adhered the tiniest bit of vellum on the back. I also inked up Fancy Flourishes for the first time, it was in the package I received today, thinking it may look a bit like swirling wind. Maybe I should have made all the balloons tilting to the right.

I was washing dishes this afternoon when my package from PTI arrived. I was up to my elbow in soapy water (no I don't own a dishwasher, never have, but I am the perfect candidate for one, I hate doing dishes) so I couldn't get to the door when the postal carrier knocked. I dried my hands as I walked to the door and there was no one there but there was a beautiful brown box between the screen door and the solid door. I was so excited, WHITE CARD STOCK and stamps. I've been out of white for a while, bought a package at Micheal's but it was not what I wanted, too much tooth.

To say I was excited was an understatement. There was no one home but me and the boy I live with would not care about stamps and card stock anyway. But you, my dear crafty readers, you know so I wanted to share with you just how I felt.


(I don't know why it is backwards.) 

I think of this scene every time I get a package. "The new phone books are here! The new phone books are here!" Classic.

Happy Crafting,

Monday, February 14, 2011

Happy Valentine's Day

I wanted to make a card for Valentine's Day for my son. The card I posted the other day was not going to cut it for an 8 year old. So I looked at my images and found one that I thought would work for him. Before making the card I was blog hopping and found a couple of challenges I wanted to join - hey let's kill 2-3 birds with one stone card.


On the Moxie Fab World blog today's challenge is "Create a stamped paper crafted project (card, gift bag, tag, layout, home decor item, mini-book cover, etc.) that incorporates a stamping with markers technique in an innovative way." On Nicole Heady's blog her Make it Monday Challenge is to use a vellum sentiment strip. Well I failed on Nicole's challenge miserably with this card. I'll have to work on that and maybe post another one later.

BUT I did use vellum on the My Favorite Things Little Loveosaurus, which I turned into a dragon with the help of some fire. The image was stamped on vellum and then colored on the opposite side. The background is watercolor paper, probably not the best material for Copics but my white card stock order has not arrived and I just used the white I had on hand.

I free handed the fire and started coloring with the limited number of markers I have. I used Acid Yellow (Y08) for the base, then when over certain parts with Blush (R20). I knew that I wanted to have a red/orange color but my Lipstick Red (R29) was going to be too harsh and on the watercolor paper probably wouldn't blend well so I scribbled a bit of the red on my craft sheet and used the yellow marker to blend it -- basically using it the way I would it I were using watercolors. I really like the way the fire turned out and think this more than satisfies the challenge of markers used in an innovative way.

One thing I've noticed about using new materials. I generally use them in ways that are innovative because I'm not sure how to use them in the first place. I am always making things up as I go. I really need to find a good Copic class or a tutor so I am using these things properly. Anyone know of a Chicago area class I can take without breaking the bank?

Happy Crafting,

Friday, February 11, 2011

A Valentine, Really?

I am not much on Valentine's day. I'm single and have only an 8 year old to share a valentine with and he doesn't care much for cards. Like most kids he is of the "give me the candy" mind-set. I used to work with a girl who said Valentine's day could be retitled "Singles Awareness Day" (or SAD) and for the last few years that's kind of how I've viewed it.

So when the folks at Silhouette announced their "Be My Valentine" contest on their blog I was stumped. I looked at the designs that came with the machine and decided to jump in anyway. I used the scalloped heart, which I like quite a bit, and decided to pull out the State of Heart patterned paper I won from My Mind's Eye a few months ago. I found some of the patterns a bit too patterny for my purposes but I LOVE the all the B sides. The touch of distressing and simpler patterns are perfect for me. So I cut out a couple of hearts and found some almost matching ribbon from my large, neglected stash for this card. It needed something else so I added a small heart punched out with the 3 hearts punch from Stampin' Up! I decided it needed rounded corner so I chomped them off with the corner chomper.

My son has put together a Valentine's Craft for his class and I wanted to share it with you. I used to put a few suckers in a styrofoam ball that was tucked into a small terra cotta pot and sent it to his day care center for valentine's day. It made lovely bouquet for the dozen or so kids that were in his class. Now that he's in grade school and there are over 20 kids in a classroom this will not work, we tested it. In the box marked Styrofoam in my craft closet was a small green tree form.
"All the suckers will fit in this Mom," he said proudly.
"Well let's see how it looks." I said, and we proceeded to stick sucker handles into the form.
Kid crafted and photographed.

We counted them all up and they did all fit, however, I was not pleased with the results. A Charlie Brown Christmas Tree came to mind. He was thrilled with it and I was forbidden to change a thing. Well he saw the Star Wars Valentines MeckMom posted and now he's having second thoughts. Who knows what we'll end up with.

The particulars
Paper: Stampin' Up! Sahara Sand and Regal Rose,  State of Heart from My Mind's Eye
Embellishments: American Craft Ribbon, Dimesionals

Happy Crafting,

Thursday, February 10, 2011

PTI Play Along


Just a quick card today for the Papertrey Button Challenge. Using buttons in anyway can be a challenge for me but in a creative way is especially difficult. So maybe we have all seen buttons as flower centers before, but I like the look and my brain is just not working any more creatively than this today.


Of course the use of stamps is a bit creative. I used the large hot air balloon decoration stamp  from Up, Up & Away as a vase and only a bit of the large stem from Four of a Kind. I stamped directly on the card without thinking about the fact that it would look like it was floating in air. I needed a table and found a bit of patterned paper that was perfect in my scrap stash. I used the balloon die to cut a dip in the paper so the vase looks like it is sitting on a table instead of on a shelf.


I embossed the vase so it's nice and shiny like porcelain.


The particulars
Paper: SU Very Vanilla, OLD patterned paper from DCWV
Stamps: Up, Up & Away and Four Of A Kind Ink: Always Artichoke Marker, Color Box Pigment Brush Pad in Peony
Embellishments: silk flowers, buttons

Happy Crafting,

Wednesday, February 9, 2011

WOYWW from Oh Yes! to What A Mess!

Well another week another mess. Last week a lot of people said, “Oh my!” to the amount of snow around my car and the reorganization of the wall above my desk. This week I’m sure some will be saying the same thing for the amount of mess on the desk – though really this isn’t bad for me.

This week I started my classes for Web Design and Animation at the local college. I don’t know how much work will be involved yet but last night didn’t seem bad. No homework per se but we were encouraged to practice coding stuff so the text of this blog post is being hand coded. The image and some of the links, not so much. Hopefully it will be done properly and will not be rejected when I try to paste this copy into the blogger text editor. Hey it works!

Because I have a longish list of things to get done today (including hopping through the some of the blogs linked to today’s What’s On Your Workdesk Wednesday post on Julia Dunnit’s blog) I am only posting the pic and an Eye Spy. So here we go:


Click for a larger image, makes searching easier.
  1. New Copic Markers
  2. A bag and flyer from Blick, where I get my Copic markers. Big sale on Thursday, which is when I will be returning one of the two E33 markers I bought. Doh!
  3. My art journal – tried to take a Jessica Sprauge class online and because it was a daily thing and I was busy about the only thing I got out of it was a cool journal.
  4. Failed attempts to sew on card stock and patterned paper.
  5. A thank you card for the wife of my son’s cub scout den leader. She sewed all the boy’s costumes for the Blue and Gold Banquet this year. They were Jawas from Star Wars and their costumes ROCKED!
  6. Tattered Angels and Mr. Huey bottles coexisting nicely.
  7. Tin foil adhered to black card stock with scissors cut out of it. The scissors were on the page I shared a couple of weeks ago, go take a look. We’ll wait.
  8. Proof I’ve scrapped at Archivers.
  9. My favorite Olfa knife.
  10. And finally the book for my HTML class.
Happy Crafting,

Tuesday, February 8, 2011

DIY Doilies or How Cool is the Replicate Tool

Punching buttons and pulling levers to see what will happen makes me happy. (You'd think I'd like slot machines but losing money makes me unhappy but that's a story for another day.) I also like to play with software to see what if will do and those icons on my newish Silhouette needed investigating. In the course of my investigations I learned a few things made a couple of discoveries and I thought I'd share them with the world, or at least those of you kind enough to read my blog.

First things first I am using the Silhouette Studio software version 1.3.0. If you are using an older version consider upgrading, this version can do some pretty cool things.

Introducing Mrs. Armot
The tools I will be discussing today can be found in the upper right hand corner of the Silhouette window. I wanted to show you what they look like because I figure some of you are probably visual people like me. When I started labeling the icons I realized they spelled out Mrs. Armot and so I have named my Silhouette Mrs. Armot. Say hello everybody.

The functions behind the icons are:
M1 - Move | R1 - Rotate | S - Scale
A - Align | R2 - Replicate | M2 - Modify | O - Offset | T - Trace

I was comfortable with many the icons in this software from the very beginning because they are similar to icons in other programs I use. Rotate, Align and Scale didn't require too much investigation. 

But what the heck was replicate and how do you use it. Well Duplicate would have been a good term too because that is one of the functions hiding under this icon. Not only can you duplicate up, down and side to side with this tool but you can also make rows and columns. (See the DIY Stencil tutorial I posted here.) Be the tool wonder we will be investigating today is Rotate 5 copies. I understood the Rotate One Copy - great if you want the same image copied and turned 90° on the center axis of the image you already have.

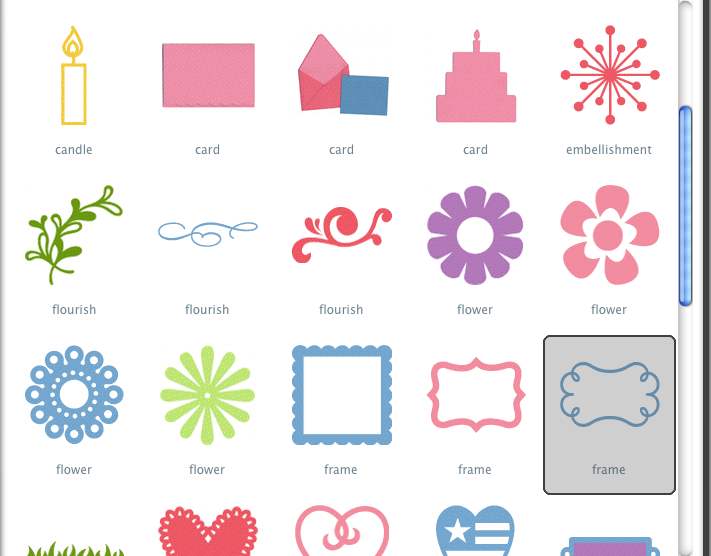
But why would I want to do that 5 times. It seemed insane. I tried it with a few of the images that come with the machine. I tried it with the second leaf image and it took that lovely branch of leaves and turned it into an overgrown forest. It just looked like a mess. Then I tried it with the third frame (see highlighted image below) and I understood the power of this tool.


I had an interesting shape, something akin to a doily. The center was open and it needed to be welded together but it looked like a doily.
 
I added a simple circle so the center would be solid, use the Align tool to Centralize everything (aka center all) and welded everything together and got this.
 
I cut it out of vellum and put it on a card.  


If I make a doily again I will not be using vellum OR I will not be adhering it around the edges. I don't like the way the adhesive shows through but the nice thing about making your own doilies is that you can make them any color you want as often as you want.

I experimented with other shapes and discovered that you need a open, symmetrical shape to make it work. I discovered that if you copy the image and scale it down to the size of the center circle in the doily above that it's a fairly complex and beautiful design.

I also discovered that I need to spend a bit more time learning all the ins and outs of the Modify too. Welding some shapes didn't work and I got a large solid so I will keep experimenting

When I play in new programs I find things that I'd like to see improved. If the folks at Silhouette America are reading this maybe in version 1.3.1 you could 
  1. make it so user can determine the point they want to Rotate/Replicate images from. I would love to be able to click on the edge of an image and rotate 5 times. 
  2. give us the ability to Flop an image with one button so we can draw one wing, flourish or whatever and get the second one in a flopped, or flipped if you like, orientation by hitting one button.

So let's see your   DIY doilies.
The particulars
Paper: Ruby Red Stampin' Up! paper
Stamps: Free Papertry Ink tag, colored with Prismacolor pencils and Gamsol, Italian Poetry background stamp from Hero Arts.
Embellishments: DIY Doily, Sentiment printed from computer.

Happy Crafting,

Wednesday, February 2, 2011

WOW WOYWW

My first class in web design and animation was supposed to happen tonight but the school has been closed because of the blizzard. So grateful because my car cannot be moved. To see more picture you can go to my Blizzard 2011 set on Flickr.
My car is not going anywhere any time soon. Someone stole my shovel
Now on to the main event. The reorganization of my craft space.

Click to see larger image.

First I thought I should move the bulletin board out from behind the door. How inspired can I be by something I can't even see? I removed a lot of junk and added some organization stuff. The To Due section is for things that have a deadline. The Ideas section is for images and notes that don't make it into my notebook. The row of envelops above Ideas contain cards with timed activities for  when I need a bit of direction/inspiration. Here is a sampling of the cards:
  • Journal
  • Read for pleasure - sometimes I need to be reminded.
  • Make a card with Glitter on it - yes I need to be told to do this.
  • Make a card with ribbon on it - yes I need to be told to do this too.
  • Clean off a work surface - I generally only clean off the space I need when I need it.
  • Finish an altered project - I am good and getting things started but this year's one little word is Complete and hopefully this will help me complete things.

Click to see larger image.
Several WOYWW visitors have commented on how organized the space above my desk was and I was happy with the set up to a point. But I got tired of being hit by falling punches and stray wood mount stamps. I decided to rearrange to minimize the damage to me and my supplies caused by, well, gravity.

I have always been jealous of those who organize their punches on Ikea Bygel rails. Well I decided to see if I could do that too. The holes don't match those in the peg board but the pegboard hooks worked ok to attach it – Yea!. I also wanted to move the pencils so they were no longer in shadows, and moved the distress inks so they were within easy reach.

I removed the organizer I was using for ink and sponges from the pegboard because I had trouble reaching everything anyway and put it where the bulletin board was and put shelves there so that nothing everything would be easy to get to.
We'll see how this new set up works out in the coming weeks. So far so good.

Of course I have to show off a project so here's a page I worked on at a crop recently. I have had a lot of bad luck lately but when I stop to think about it each bad turn could have been a lot worse. Each episode turned out to be the best case scenario, financially, so I scrapped them all on this page. The faulty carbon monoxide detector, the knee injury, the plumbing problem, and when I find the key tag from the car repairs I will add that too. I guess I really am blessed.


The particulars
Paper: patterned paper from Stampin' Up!, Solid papers Summer sun and Only Orange. Die cut from Silhouette and Spellbinders. Happy Crafting,


*Edited to add Flickr link.